How to save a movie maker file as mp4
Windows Movie Maker, a free video editing software released by Microsoft, can help you efficiently and quickly create your own videos for your friends and family. however, do you know how to save the movie maker project after you finish editing your movie?
Don’t worry if you don’t know how to save movie maker to mp4. Now this post will tell you how to save a movie maker file as a video and show you the steps to create your own custom video export settings.
how to save a movie maker project using recommended settings
windows movie maker offers recommended settings to save movie maker to an mp4 video that can be uploaded, shared and burned.
Whenever you choose the recommended settings, free movie maker will look at the size and bitrate of your source videos and choose settings based on what it thinks will produce the best balance between file size and video quality. video.
Now, let’s see the detailed steps on how to save a movie maker file as a video.
step 1. Start windows movie maker, open a new project, import your videos and images, split and trim your movie, add transitions and effects to enhance your movie, and add titles and credits to complete your movie as you like.
watch video
click the play button to learn how to split and trim a video.
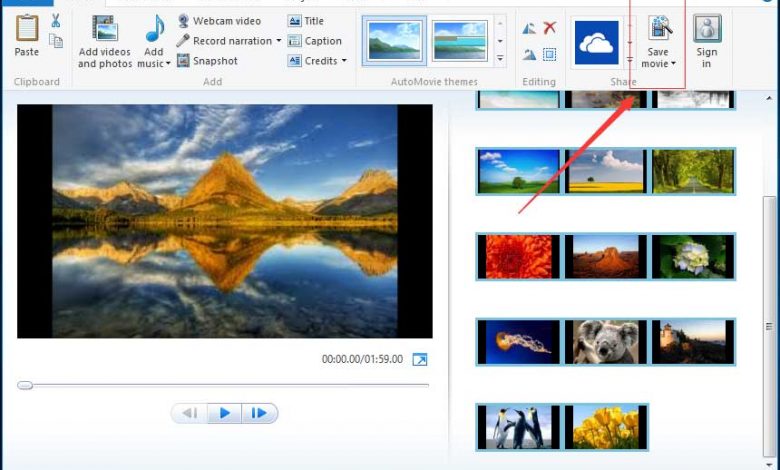
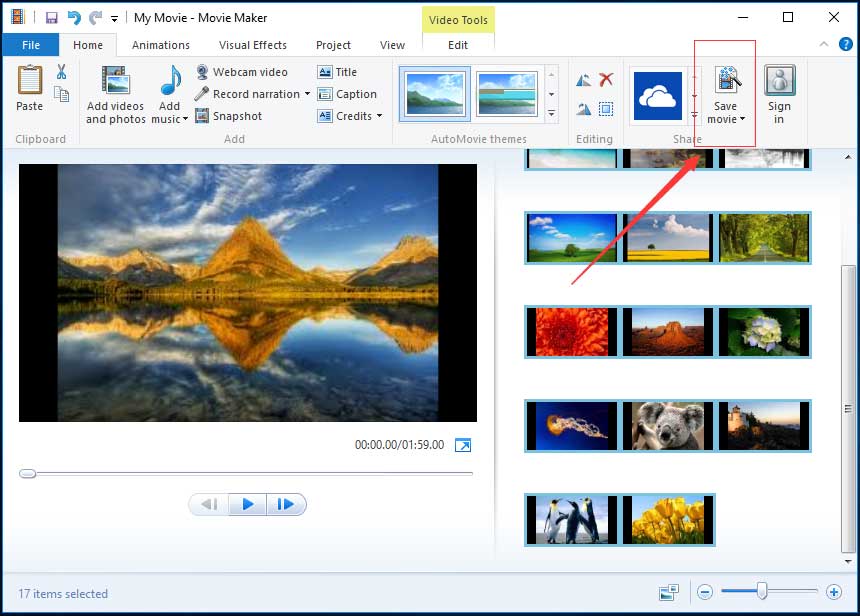
step 2. go to the ribbon and then click the save movie button found in the share section on the home tab. this will bypass all the complicated video settings you may not understand and will take you directly to the save movie dialog.
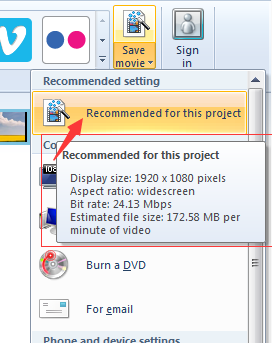
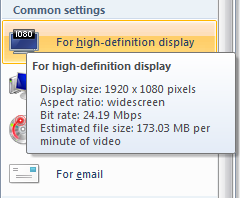
You can click the triangle next to Save movie and hold your mouse over the Recommended for this project to learn the detailed information if you are curious to what video settings Windows Movie Maker deemed optimal for your project, as shown below.
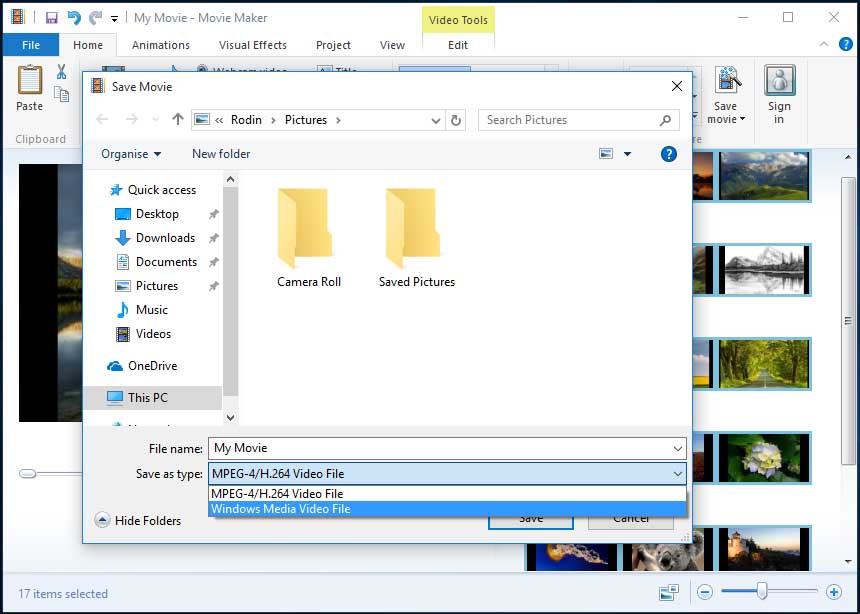
Step 3. Type your file name and choose your video file type: MPEG Video File (*.mp4) or Windows Media Video File (*.wmv).
For most people, the recommended settings will be sufficient for most purposes. You can convert Movie Maker file to MP4 or WMV, and then you are able to share it, upload it or burn it as you see fit.
hello! i saved the windows movie maker project to mp4 without any difficulty. I want to share it with you. click to tweet
However, if you plan to share your movie through a specific medium, such as email or DVD, we suggest checking out some of the Windows Movie Maker video presets. Now, I guess you are wondering:
“how can i save videos from movie maker using preset video settings?”
Do you want to know the answer?
how to save a movie maker project using default video settings
The best free video editing software offers some preset video settings and these settings are optimized based on what you plan to do with the file once it is saved.
The steps are as follows:
step 1. click the little triangle on the save movie button. after that, you will find these preset video settings in the drop down menu. these settings are optimized for various devices, as shown below.
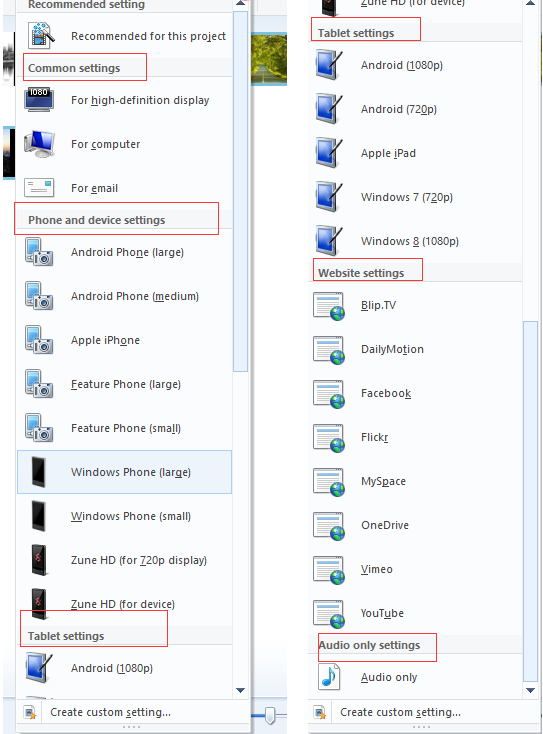
Common settings: For high-definition display, For computer, Burn a DVD, and For email.
The burn a dvd option is only available in windows 7. if you choose this option, the file will be saved to the location you choose and then loaded into a new windows dvd maker project.
phone and device settings: android phone (large), android phone (medium), apple iphone, feature phone (large), feature phone (small), window phone ( large), windows phone (small), zune hd (for 720p display), and zune hd (for device).
tablet configuration: android (1080p), android (720p), apple ipad, windows 7 (720p) and windows 8 (1080p).
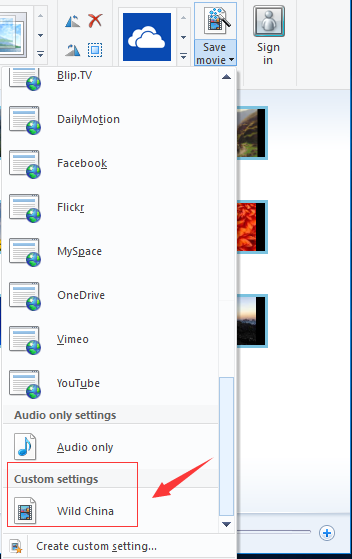
website setup: bilp.tv, dailymotion, facebook, flickr, myspace, onedrive, vimeo and youtube.
audio only setting: audio only.
step 2. hover over an option to view details, and then choose an appropriate setting, such as for a high-definition display, choose a location to save the file, and then click or tap the save button.
See! it is very easy to save a Movie Maker file as a video.
However, what should you do if you don’t want to choose the existing current setting to convert windows movie maker video to mp4 or wmv? Is it possible to publish your video using more specific options?
Of course you can!
windows movie maker allows you to create custom settings for your use. Now, I guess you are wondering:
“how do i create your own custom settings in windows movie maker?” please continue reading!
how to save a movie maker project by creating new custom settings
After editing your movie in windows movie maker, you can try the following 6 steps to optimize the video for playback on specific devices.
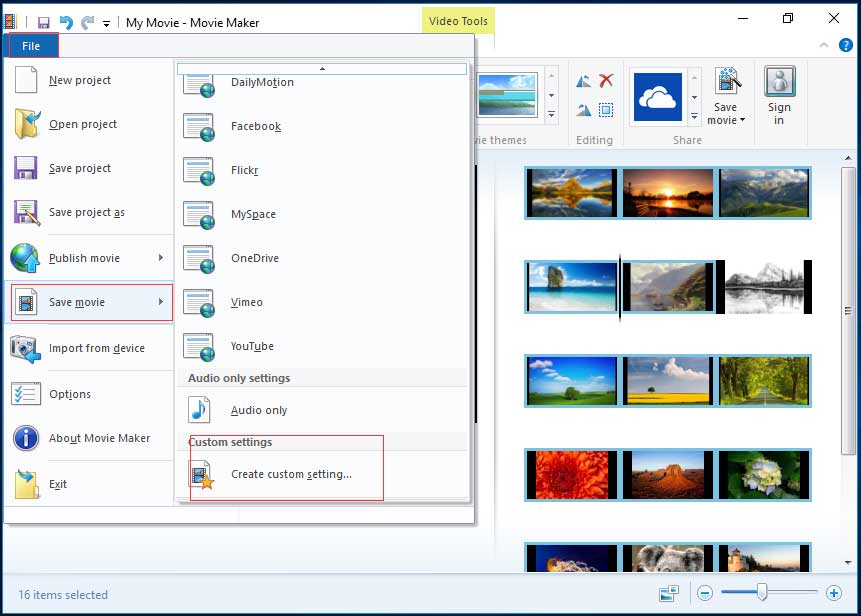
step 1. click the file button located in the upper left corner of the free video editing software window to open the file panel.
step 2. click the save movie button to open a new submenu on the right.
step 3. scroll down the submenu and click the create custom configuration button at the bottom of the submenu.
Step 4. Now, input the following information:
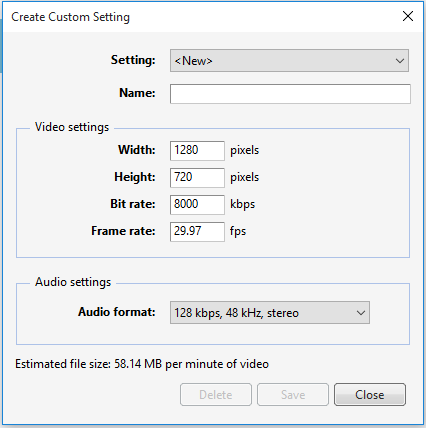
- Setting: Click on the setting’s drop-down list. You either can choose, “<New>,” to start from scratch or select any of the existing settings from the list.
- Name: Give this new export setting a name (for example, Wild China).
- Width & Height: Enter your source file’s original width as well as height. If you wish to export your video at a smaller frame size, edit these values. If you aren’t sure, leave them as-is.
- Bit rate: This can affect the level of detail in your video. Although lower bit rates lead to smaller file sizes and faster uploads, you had better set this higher for improved quality.
- Frame rate: This will affect the smoothness of motion and animations in your video. For basic slideshows you can choose 24fps because photos don’t have to be particularly high. For full motion video it’s not usually necessary to go above 30fps.
- Audio format: Click on the drop-down list and select the audio settings you want. The higher the bit rate (kbps), the better the quality, but it also means a bigger file size. 192 kbps, 48 kHz, stereo is considered CD quality, but 128kbps is passable for video.
step 5. check the estimated file size.
Whenever you make an adjustment to the settings, an estimated file size will be displayed at the bottom of the window. the higher you set them, the better the quality and the larger the file size. of course, the quality will not exceed the original material.
step 6. click save after finishing this configuration. Then your video will be saved as a windows movie maker video settings file (.wlvs). after saving, you will find that this file will be added to your list of video settings in the save movie menu as shown below.
Hi! I now have 3 ways to save Windows Movie Maker project with ease. Share them with more people. Click to Tweet
3 useful tips on using windows movie maker
windows movie maker supports many file types.
windows movie maker supports almost any video, audio and photo format.
the formats to import are:
video files: mp4, mov, 3gp, avi, rmvb, swf, flv, mkv, mpg, vob, wmv
audio files: mp3, aac, amr, flac, m4a, m4r, mmf, wav, wv, mono
image files: jpg, png, gif, bmp, ico, jpeg, pcx, tga, tiff, webp
the formats to export are:
mp4, m4a, wmv
upload a windows movie maker video
After saving windows movie maker project, you can share it with your friends or upload it to youtube, facebook and other famous social platforms. in fact, with windows movie maker you can upload your video directly to onedrive, youtube, facebook, flickr, vimeo, etc.
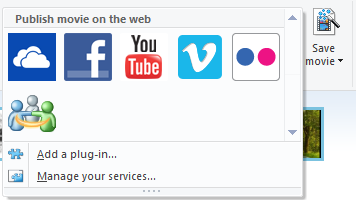
You can click on the icon of a video-sharing website like YouTube in the Share group under the Home button to directly upload your current Movie Maker video. Then, choose the suitable resolution of your movie to publish it.
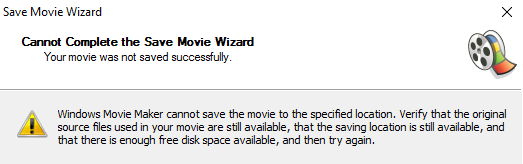
error: windows movie maker can’t save movie?
Based on a survey, we found that some users will receive the following error message when saving the windows movie maker project:
windows movie maker cannot save the movie to the specified location. verify that the original source files used in your movie are still available, that the save location is still available, and that there is enough free disk space, and then try again.
If you encounter this error, you should try the following solutions:
- Make sure your computer has enough memory to process your project.
- Close all other tasks before converting the windows movie maker file to a video.
- do not edit corrupted files in free video editing software.
- make sure your source files are not locked by any kind of “folder lock” software. many users of “folder lock” software have problems when the locked folders include those with the source files used by a project.
- reinstall windows movie maker.
end result
Now, it’s your time to convert your windows movie maker video to mp4 or wmv.
If you have any questions or suggestions on how to save a movie maker project, feel free to leave a comment below or send us an email via [email protected]. we provide technical support 24 hours a day, 7 days a week.